Monday, March 17, 2014

Dormer Ceiling Part 16


Guess what came on the weekend?  No, not an email update from the post office about my ceiling tiles arriving, but the actual ceiling tiles!!    
I estimated that we would need 63 tiles so I ordered 70. 
 They were shipped in one box!!
I couldn't even wait for a picture so the box is mostly unloaded  

So I must first say, the tiles are not 20"x20" that they are advertised as.  They are actually 19-9/16 and not overly consistent at that, as some were 19-5/8 and a little larger.  Other than that, they were pretty much what I expected.
 Another thing that the website claims is that they are easily cut with an olfa knife.
A brand new blade was used for this shred!

We ended up using scissors which were perfect.  The tiles were very easy to cut!

Mastic was applied on high spots and easily secured to the ceiling.
 They were easy to shift around and held to the ceiling firmly.

The center of the room was determined with a chalk line.  Our pattern worked best with the center of the tile lining up with the center of the room so we snapped a chalk line to where the edge of the tile would start which was half a tile off center.  We followed the line all the way down and that was our first row.
The biggest part of the room was done first.
We weren't sure that the tiles would bend and stick to the curve of the roof.
They worked perfectly!!

A pan shot taken with the IPhone.
Would I recommend these tiles for a project?  Yah probably, as they were really easy to install. 
 Keep your fingers crossed for me.  I am going to attempt to paint them today!

So I am still waiting for my email from USPS telling me that my ceiling tiles have arrived!

Cheers.

Linking Up With

Saturday, March 15, 2014

And Yet Another Ukrainian Easter Egg Holder

This project was inspired from my last one,

 but with a little extra!

Kinda like getting pregnant and finding
 out you're having twins! 
 On second thought, I guess it's not like that at all.

An old piece of board salvaged from my collection of wood from a fallen down old barn!  That's the little extra!
 Yep that's lichen!
  A lichen is not a single organism, but the result of a
 partnership (mutualistic symbiosis) between a fungus and an alga!

Kinda like that twin thing again!....but not really

A few dead branches from a fallen tree  were cut into many pieces to make the  previous project and this one

Hot glue secured the branches onto the old wood!

I drilled pilot holes from the bottom, into each of the branches.....

and secured with drywall screws.

A felt pad was added to each corner


And now, a whole lot of pictures....Probably a few too many!


I glued on a replica of an old key.


A second one with a different key.  I pulled a sticky jewel from my stash and glued it on the key for a bit of bling.


I love the board.  It adds a nice rustic edge to the whole piece. 


Look...It's that little extra.   Twins!!


Cheers!
I Party With

Pursuit of Functional HomeBy Stephanie Lynn
Tip_Me_Tuesday_Button_TipJunkie-jpg

Funky_Junk's_Party_Junk_link_party_150

Tuesday, March 11, 2014

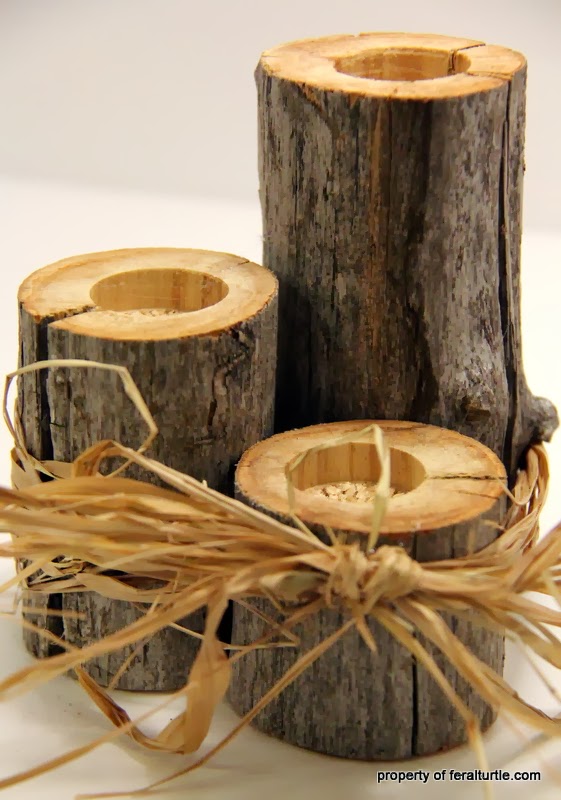
Easter Egg Holders and Broken Branches


In keeping in the Easter egg spirit, I decided to try my hand at a less glitzy project. 
 This project was inspired from a fallen tree. 
How sad is that :(

Don't be sad for the little trees.  They are in a good place now.....my windowsill!


These were all hot glued together and drilled with a forstner bit.
 I had to redrill the holes deeper as the egg was bottoming out,


What's Easter without some bling!


I thought this was becoming an obsession like those crazy spiders but after
 I made five of these,  I ran out of wood!

On a happy note, no live trees were harmed
 in the making of these holders, or glass dragonflies, or chickens!

Cheers!

Linking up at

Pursuit of Functional HomeBy Stephanie Lynn
Tip_Me_Tuesday_Button_TipJunkie-jpg

Funky_Junk's_Party_Junk_link_party_150